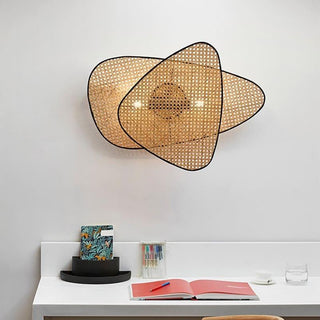
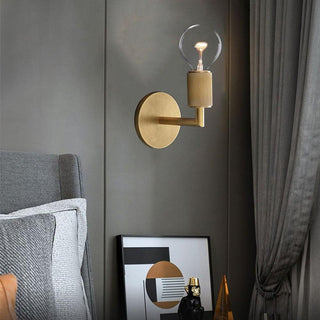
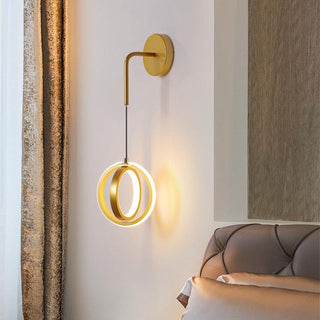
Replacing a wall sconce may seem like a big task, but with the right tools and a little guidance, it’s a DIY project anyone can tackle. Whether you’re upgrading your lighting decor, fixing an outdated fixture, or simply refreshing your space, this guide will walk you through the process. Let’s dive in!
1. Preparing for the replacement
1.1. Understanding your existing wall sconce
Before diving into the project, it’s important to understand your current wall sconce setup. This will help you prepare the right tools and know exactly what steps to take.
Is your wall sconce hardwired or plug-in?
-
Hardwired sconces: These are directly connected to the electrical wiring in your wall. They don’t use a visible cord or plug and are controlled by a wall switch. For these, you’ll need to locate the junction box behind the sconce. This box holds the electrical wires that connect the fixture to your home’s power. If your sconce is hardwired, you’ll be working with electrical wiring, so safety is key.
What to do:
- Turn off the power at the circuit breaker for the room you’re working in.
- Use a voltage tester to ensure no electricity is flowing to the fixture.
- You’ll need to disconnect the existing wiring (usually black, white, and bare or green ground wires) when removing the old sconce.
-
Plug-in sconces: These are much simpler. They have a visible cord that plugs into a nearby electrical outlet. They’re great for renters or situations where you don’t want to modify your home’s wiring.
What to do:
- Unplug the sconce from the wall outlet.
- Detach the fixture from its mounting bracket or screws.
Is the fixture mounted on wall studs or drywall?
-
Wall studs: These are vertical wooden beams behind your walls that provide structural support. If your sconce is attached to a stud, it’s securely anchored, which is ideal for heavier fixtures. You’ll know the fixture is mounted on a stud if it feels very sturdy and doesn’t shift easily.
What to do:
- Use a stud finder to locate the stud.
- When installing your new sconce, align the mounting bracket with the stud for maximum stability.
-
Drywall without studs: If your sconce is attached to drywall and not supported by a stud, it relies on drywall anchors or screws for support. This setup is fine for lightweight sconces but may not hold heavier fixtures.
What to do:
- Use strong drywall anchors to ensure the new fixture is secure.
- If possible, choose a mounting location where you can attach the sconce to a stud for extra stability.
Why this matters
Understanding whether your sconce is hardwired or plug-in determines the complexity of the project. Knowing if it’s mounted to a stud or drywall ensures your new fixture will be securely installed. Taking these steps before removing your old sconce will save time and prevent frustration later on.
1.2. Tools and materials you’ll need
Gathering the right tools and materials is essential for a smooth installation. Here’s what you’ll need:
- Screwdriver (Phillips and flathead)
- Wire stripper
- Voltage tester (contact type preferred)
- Electrical tape
- Wire nuts (usually included with new light fixtures)
- New sconce light fixture
- Mounting bracket (typically included)
- Drill with bits for drywall or metal screws
If your wall sconce light is mounted on drywall, consider using drywall anchors to secure the fixture on the wall. If the junction box is loose, tighten it or replace it to prevent future issues.
1.3. Safety first
Always prioritize safety. Begin by turning off the power source at the service panel or circuit breaker. Use a contact voltage tester to confirm no current is running through the wires. If you’re unsure about the electrical wiring, it’s okay to consult an electrician for guidance.
2. Removing the old sconce

Step 1: Remove the light bulb and cover
Carefully remove the light bulb and any decorative shades or covers. This allows access to the mounting plate and base of the fixture. For older light fixtures, you might need to gently loosen painted edges with a utility knife.
Step 2: Unscrew the mounting base
Locate the screws or caps holding the mounting plate to the wall. Unscrew the mounting hardware and gently pull the fixture away. Be careful not to damage the drywall or junction box underneath.
Step 3: Disconnect the wires
Once the fixture is off, you’ll see the wires connected to the electrical box. Carefully remove the wire nuts to expose the black, white, and bare copper or green ground wires. Mark each wire to avoid confusion when installing the new wall sconce light.
3. Installing the new wall sconce

Installing a new wall sconce might feel intimidating, but breaking it into steps makes it manageable. Here’s a detailed explanation of the process, covering different scenarios you might encounter.
Step 1: Attach the mounting bracket to the junction box
- The mounting bracket is the metal piece that comes with your new sconce. It provides the support to attach the fixture to the wall.
- Locate the junction box in the wall. This is the housing for the electrical wires.
- Use the screws included with the new sconce to attach the mounting bracket securely to the junction box. Tighten the screws firmly so the bracket doesn’t shift.
If you don’t have a junction box:
- You’ll need to cut a hole in the wall to install one. Use a drill and a junction box template (often included with new fixtures or available at hardware stores) to ensure the hole is the correct size.
- Position the hole carefully, aligning it with where you want the center of the sconce to sit. Once the box is in place, secure it to the wall studs or use drywall anchors.
Step 2: Connect the wires
Wiring the new sconce correctly is essential for safety and functionality. You’ll see three types of wires:
- Black wires (hot): These provide the electrical current to the fixture.
- White wires (neutral): These complete the electrical circuit.
- Bare copper or green ground wires: These protect the fixture from electrical faults.
What to do:
- Match the black wire from the wall to the black wire from the fixture.
- Connect the white wire from the wall to the white wire from the fixture.
- Attach the bare copper wire (or green) from the wall to the green ground screw on the mounting bracket.
Tips:
- Use wire nuts to secure the connections. Twist the wires together clockwise, cap them with the nut, and give it a gentle tug to make sure it’s tight.
- Wrap each connection with electrical tape for added safety. This prevents the wires from coming loose over time.
Step 3: Mount the new fixture
Once the wires are connected, it’s time to attach the fixture to the wall:
- Carefully align the sconce’s base with the mounting bracket.
- Slide the fixture into place so it sits flush against the wall.
- Use the screws provided to secure the fixture to the bracket. Tighten them until the fixture feels stable but avoid over-tightening, which could damage the wall or fixture.
Step 4: Install the light bulb and decorative elements
- Insert the recommended light bulb for your sconce. Check the fixture’s packaging to see if it specifies a maximum wattage or type of bulb (e.g., LED or incandescent).
- Add any decorative shades or covers included with the sconce. These often attach with screws or slide into place on the fixture.
Special case: Installing a new junction box
If you’re installing a sconce in a location without an existing junction box, follow these steps:
- Cut a hole in the wall where you want to install the sconce. Use a template or measure carefully to ensure the hole fits the box snugly.
- Insert the junction box into the hole, ensuring it’s aligned with the desired placement for the sconce.
- Secure the box to the wall studs or use drywall anchors if studs aren’t available.
- Pull the electrical cables through the box, leaving enough length to make secure connections.
Key Tips for Success
- Double-check your wiring connections before proceeding. Loose wires can cause the fixture to malfunction or pose a safety hazard.
- If you’re unsure about the wiring or installation, don’t hesitate to consult an electrician.
- For aesthetic alignment, ensure the fixture is centered and level on the wall. Use a level tool if needed.
4. Testing and adjustments

Restore power
Turn the circuit breaker back on and test the new light fixture. If it doesn’t work, double-check the wire connections. Ensure the light switches are functional and properly aligned with the fixture on the wall.
Adjust the placement
Take a step back and assess the placement of your new wall-mounted light. The height should suit its purpose, whether as task lighting or an accent light. Make adjustments to align it with nearby decor, such as a mirror or artwork.
Not sure how to place your wall sconce? Read our dedicated article on wall sconce height and placement to ensure your new wall sconce placement is optimal.
5. Pro tips for a better installation
Upgrade your setup
For added convenience, consider hardwiring a dimmer switch to your new fixture. This allows you to control brightness easily and adds a modern touch to your space.
Custom placement
Use a stud finder to locate a stable base for your new fixture. If necessary, extend or relocate the wiring using fish tape to position the light exactly where you want it. For larger fixtures, ensure the strap and mounting hardware can support the weight.
Eco-friendly choices
Choose energy-efficient LED bulbs for sustainable lighting. LEDs provide excellent illumination for outdoor lighting, bathrooms, and hallways, while reducing energy consumption.
Troubleshooting common issues
- No light: Double-check the connections at the junction box and ensure the power source is active.
- Flickering: Secure loose wires with wire nuts and confirm the switch box hole is not causing interference.
- Loose mounting: Tighten the mounting screws and use drywall anchors if necessary.
Conclusion
Replacing a wall sconce light is an easy and satisfying project. With the right tools, a bit of patience, and this step-by-step guide, you can upgrade your space with confidence. Whether you’re installing task lighting in your bathroom, creating ambiance in your hallway, or simply modernizing your decor, the perfect wall-mounted light can make all the difference. Happy DIYing!


